Oosterbeek Perimeter Route
-
What:
Walking route -
Distance:
7.9 km

The perimeter walk takes you past sites of great victories, small tragedies and acts of courage, past old country estates, former emergency hospitals and traces of the war that are still visible today.
The perimeter was a horseshoe-shaped defensive line around Oosterbeek into which British and Polish troops had been driven back during the Battle of Arnhem. In this area, the Allies held their ground for nine days under constant German attack. The Perimeter Walk takes you past sites of major battles, personal suffering and acts of bravery, past old country estates, former field hospitals and traces of the war that are still visible today.
Operation Market Garden was an Allied offensive during the Second World War, taking place from 17 to 26 September 1944. Airborne troops were tasked with capturing and holding various bridges over rivers and canals in the Netherlands until they could be relieved by ground forces. One of the targets was in Arnhem: the Rhine Bridge. However, German resistance around Arnhem proved much stronger than expected, and most of the nearly 12,000 British and Polish soldiers failed to reach the bridge.
On 20 September, the Allied troops fell back to Oosterbeek, where the perimeter was established: a horseshoe-shaped defensive line in and around the village, with the Rhine as its base. Heavy fighting took place within this perimeter in the days that followed. Supply lines to the Allied troops were severely lacking, and the soldiers soon found themselves without food, medical supplies or ammunition. Many soldiers had, in the meantime, been wounded or killed. By 25 September, supplies were virtually exhausted and it became clear that the Allied ground forces would not reach them in time. The remaining Allied airborne troops were forced to withdraw across the Rhine. 2,400 soldiers made the crossing to safety, but the wounded and medical personnel were left behind. 6,500 British and Polish troops were taken prisoner, and 1,900 were killed.
The civilian population of Oosterbeek spent these turbulent days in cellars in the hope of escaping the danger, but here too there were dozens of casualties. After the battle, Oosterbeek lay in ruins and its inhabitants were forced to evacuate.
Explanation of starting point
This route starts at the Airborne Museum ‘At Hartenstein’. At the Airborne Museum, you can buy a route booklet to accompany this walk. There is a free car park right next to the museum. The entrance to this is next to the restaurant ‘Klein Hartenstein’ at Utrechtseweg 226. From here, it’s less than a minute’s walk to the museum.
More Airborne walking routes
Would you like to discover more walking routes in the Airborne Region themed around Operation Market Garden? Then take a look at the other walking routes in the Airborne Region!
Here’s what you’ll see
-
Airborne Museum Hartenstein
Airborne Museum Hartenstein
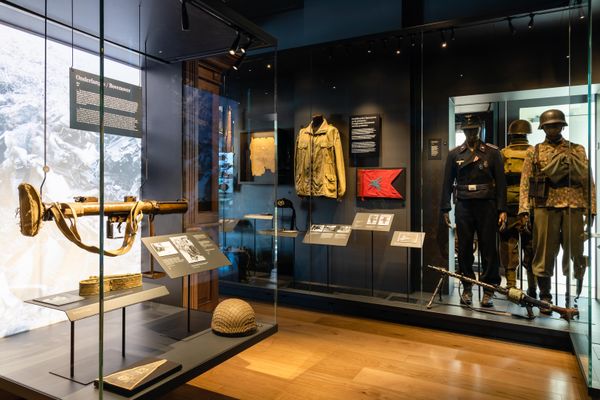
Experience the Battle of Arnhem at the site where British airborne troops had their headquarters in 1944. Explore personal stories and original artefacts, and step into the underground Airborne Experience at Villa Hartenstein. Read more
-
The Perimeter
The Perimeter
The perimeter was a horseshoe-shaped defensive line around Oosterbeek, into which British and Polish troops had been driven back during the Battle of Arnhem. In this area, the Allies held their ground for nine days under constant German attack. Read more

-
Stationsweg 8
Stationsweg 8
The house at Stationsweg 8 was occupied by British troops and formed part of the British defence line. The Kremer-Kingma family spent seven days with the troops on the eastern edge of the perimeter. Read more

-
Oosterbeek-Hoog station
Oosterbeek-Hoog station
The northernmost section of the perimeter was located near Oosterbeek station. The troops north of the railway line were unable to defend their positions and withdrew. The level crossing remained extremely dangerous. Read more

-
Hotel Dreyeroord
Hotel Dreyeroord
Hotel Dreyeroord served as the headquarters of the Scottish troops for several days. Following a fierce battle – the Battle of the White House – and heavy losses, the hotel had to be abandoned. Read more

-
Ommershof
Ommershof
Ommershof stood on high ground on the northern edge of the perimeter. When the British troops withdrew from Dreyeroord, the troops at Ommershof also had to abandon their position. Read more

-
Paul Krugerstraat 70
Paul Krugerstraat 70
The house at Paul Krugerstraat 70 served as a medical post for the 7th King’s Own Scottish Borderers during Operation Market Garden. British soldiers wounded during the fighting were treated here. Read more

-
Bakkerij Crum
Bakkerij Crum
The Crum family’s bakery was located at 23 Paul Krugerstraat. During the battle, the bakery found itself right in the thick of the fighting between British and German troops. The Crum family and other villagers took shelter in the cellar. Read more

-
De Naald
De Naald
De Naald was the first monument to be built in Oosterbeek to commemorate the war. Despite the shortages of the time, building materials were gathered and the monument was unveiled in 1947. Read more

-
Villa Hartenstein
Villa Hartenstein
Villa Hartenstein served as the headquarters of the British troops under the command of General Urquhart. Due to shelling, the headquarters had to be relocated to the building’s cellar. Read more

-
The Tennis Court
The Tennis Court
The tennis court behind Villa Hartenstein was used as a temporary prisoner-of-war camp. Over 200 prisoners of war were held here. Read more

-
De Mortierput
De Mortierput
The 1st Border Regiment guarded the western side of the perimeter. Mortar teams from the regiment were dug in along the Van Lennepweg. Read more

-
The Western Perimeter
The Western Perimeter
During the Battle of Arnhem, the 1st Border Regiment was one of the few to fulfil its original objective: defending the western British line. Read more

-
The Hemelse Berg
The Hemelse Berg
During the Battle of Arnhem, the Hemelse Berg estate became a refuge for refugees, but it too did not emerge from the war unscathed. Read more

-
De Westerbouwing
De Westerbouwing
The high ground of the Westerbouwing came under heavy attack from German troops. The British troops were unable to repel the attacks and lost this strategic position. Read more

-
The Polen near Driel
The Polen near Driel
On 21 September, Polish troops landed at Driel. Only a small proportion of the troops managed to reach the perimeter, but their support was vital. Read more

-
Operation Berlin
Operation Berlin
When the situation for the troops in Oosterbeek proved untenable, the decision was taken to evacuate. On the night of 25–26 September, the evacuation took place. Read more

-
Friends of the Oude Kerk Oosterbeek Foundation
Friends of the Oude Kerk Oosterbeek Foundation
The church is the oldest in the Netherlands (dating from around 950) and played a major role in the Battle of Arnhem. It is a listed building in its original pre-Romanesque style. Read more

-
De Weverstraat
De Weverstraat
As one of the perimeter’s outer boundaries, the Weverstraat suffered extensive damage. German artillery caused considerable damage, but the breach of the perimeter was prevented at the last minute. Read more

-
The Tafelberg
The Tafelberg
Hotel de Tafelberg was one of the two main medical centres within the perimeter. This is where the operations were carried out. Read more

-
Schoonoord and Vreewijk
Schoonoord and Vreewijk
The Schoonoord and Vreewijk hotels were intended as temporary medical centres in Oosterbeek, but became the most important medical posts within the perimeter. Read more

Features


